Mastering Cell Size in Excel: How to Adjust Row Height & Column Width Like a Pro

Master your Excel canvas! Discover every hidden trick to resize rows and columns—fast drags, precise inputs, secret shortcuts, and pro-level hacks. From messy sheets to pixel-perfect perfection, this guide transforms beginners into true Excel cell-size pros!
Truncated text and cramped data are a daily show in our Excel life. Whether we use Excel for data entry or we use it for data analysis, every time we import data into Excel it becomes messy. Learning how to change cell size in Excel is one of the first and foremost skills for any beginner. In this detailed tutorial for Excel beginners, you’ll learn not only the basic clicks and drags but will also unveil powerful techniques to make your worksheets clean, professional, and easy to read.
Whether you're looking to increase row height for better readability or adjust column width to reveal cut-off text, we've got you covered. Let's dive deeper and take control of your Excel canvas.
Myth Busting: How to Resize a Cell in Excel!
First, a fundamental truth: you can never resize a single cell. In Excel, a cell's dimensions are governed by its row height and column width. Changing a column's width affects every cell in that column, and changing a row's height affects every cell in that row. But still, we can change a single cell size, at least visually. Continue reading to find this hidden gem. We'll start with the easiest methods and progress to the most powerful. This is an Excel Beginner to Advanced tutorial on changing cell size in Excel.
Fact Check: You can input a maximum of 253 lines in a single Excel cell.
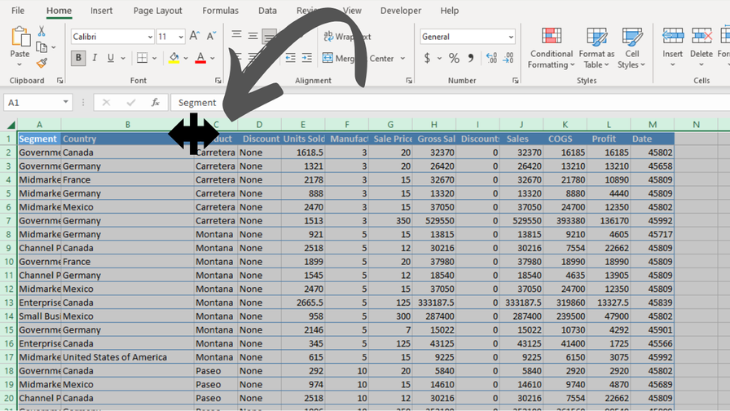
Method 1: The Mouse Click (Quick Click-and-Drag)
This is the most intuitive way to adjust cell size easily, and you should learn it too.
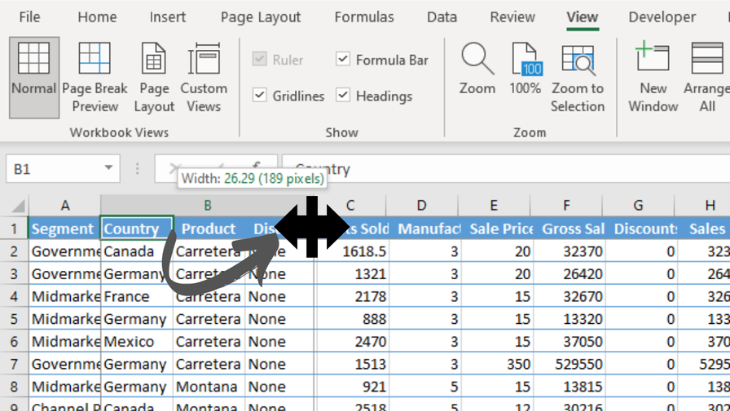
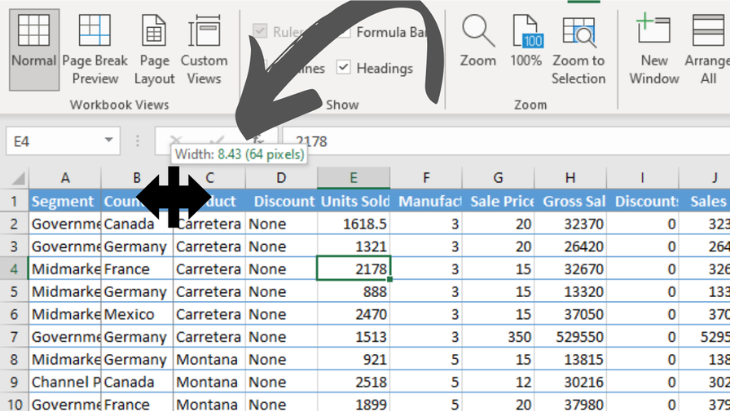
For Column Width: Hover your mouse cursor over the right-edge separator of the column header or column name (e.g., between 'B' and 'C'). The cursor will change to a double-sided arrow (↔). Click and drag left or right to decrease or increase the cell width.
For Row Height: Hover your mouse over the bottom-edge separator of the row header or row number (e.g., between '3' and '4'). When the cursor becomes a double-sided arrow (↕), click and drag up or down. This will resize the row height. This method is perfect for quick, visual adjustments.
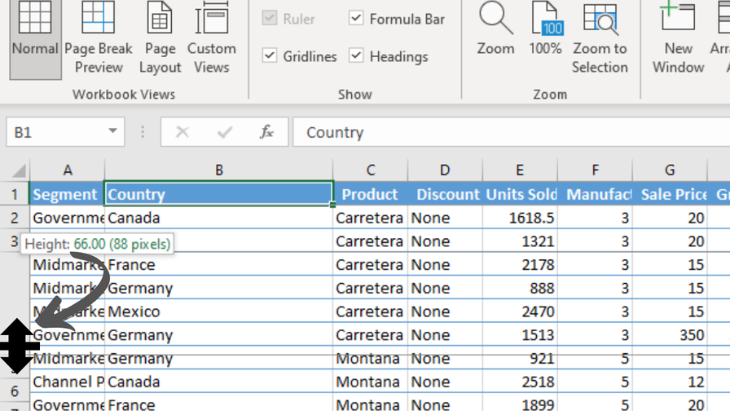
Pro Tip: You can see the current row height and column width once you click and hold on those row and column separators.
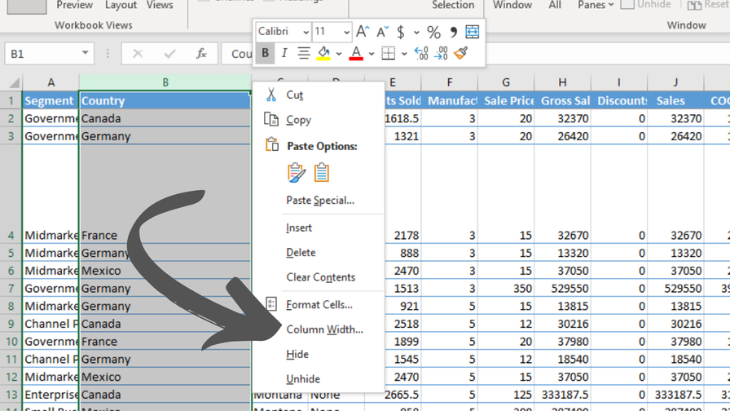
Method 2: The Context Menu (Right-Click)
As stated in the above method, eyeballing row height might not be a professional approach as you can’t always get the same measurement. It’s obvious we need a more precise way to resize row height and column width (cell size). Speed up your workflow by using the right-click menu, a favorite for power users. It gives us the power to specify cell size, making it explicit and spontaneous.
To change cell height: Select the entire row(s) by clicking on the row number(s), right-click, and choose Row Height.
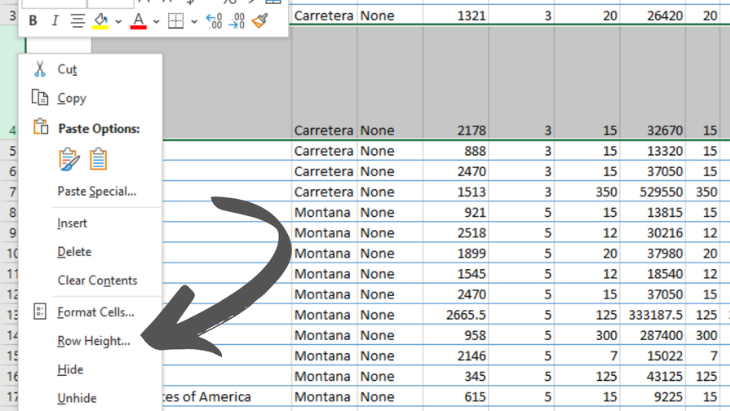
To change cell width: Select the entire column(s) by clicking on the column name(s), right-click, and choose Column Width. Enter your value and click OK. It’s that simple.
Fact Check: Did you know the default row height in Excel is 15 points (20 pixels) and the default column width is 8.43 points (64 pixels)? You can resize a row height from 0 to 409 points, where 0 means a hidden row. The column width can be changed from 0 to 255, where 0 means a hidden column.
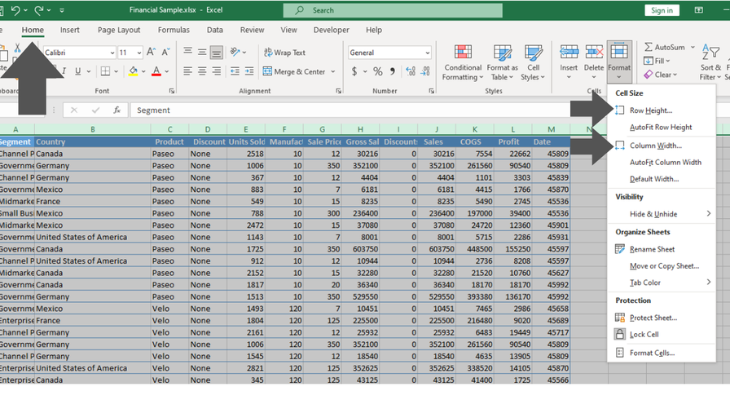
Method 3: The Precise Input (Format Menu)
For spreadsheets requiring consistency and precision, you need numerical control. This is where the “Format” menu shines. It falls under the “Home” tab and doesn’t have a primary keyboard shortcut, though you can get there on the keyboard using the secondary keyboard shortcut.
1. Select the cells, rows, or columns you want to modify.
2. Go to the “Home” tab.
3. In the “Cells” menu group, click “Format.”
4. From the dropdown menu:
To set an exact measurement, select “Row Height” for row size or “Column Width” for column size and enter your desired value.
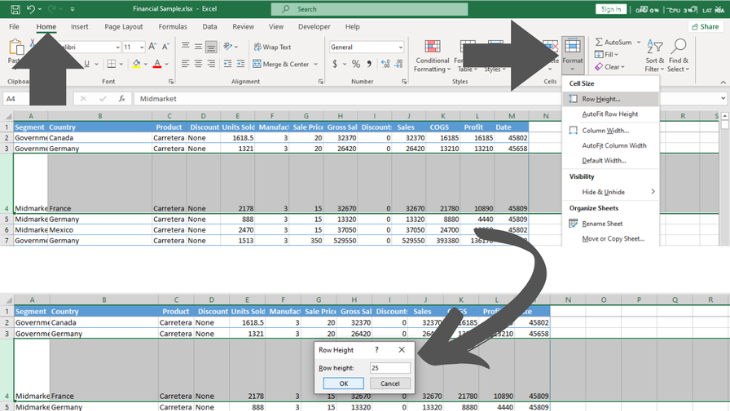
To let Excel handle the cell size, select “AutoFit Row Height” and/or “AutoFit Column Width” based on your requirement. It will autofit the row and cell size based on the content inside the cell.
Fact Check: No matter how you resize a cell in Excel, you can only place up to 32,767 characters.
Method 4: The Speed of Keyboard (Keyboard Shortcuts)
For those who prefer to keep their hands on the keyboard, these shortcuts are invaluable. Although adjusting row height and column width doesn’t have a primary keyboard shortcut, we are blessed with the secondary keyboard shortcut.

To Adjust Row Height: Select your cell(s) and press Alt + H + O + H. This opens the Row Height dialog box. Now set the row height unit (any number between 0 to 409) to change the height accordingly.
To Adjust Column Width: Select your cell(s) and press Alt + H + O + W. This opens the Column Width dialog box. Now set the column width unit (any number between 0 to 255) to change the cell width accordingly.
Master these shortcuts to dramatically speed up your formatting.
Pro Tip: Primary keyboard shortcuts are those pre-integrated with Excel and start with the CTRL button (e.g., CTRL + C to copy). Secondary keyboard shortcuts are designed as a workaround for the mouse. We can literally get to all the menus and menu groups from the ribbon with them. They start with the ALT key and usually have two or more character combinations. Here you have to press the keys sequentially, not simultaneously like primary Excel shortcuts (e.g., Alt + H + O + W to change column width).
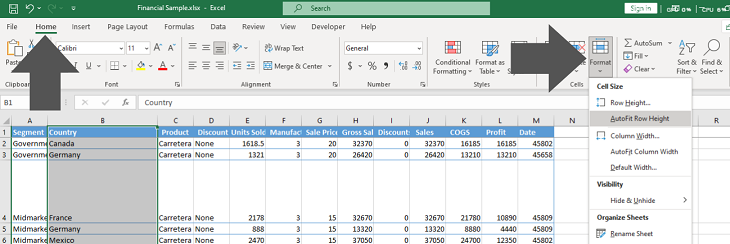
Method 5: The Magic Double-Click (AutoFit)
Why manually adjust when Excel can do it for you? The AutoFit feature is a game-changer for efficiency. As seen in Method 3, we get a glimpse of Excel’s Autofit Row and Column feature. It was a bit slower — we had to click on the “Home” tab and then from the “Cells” menu group select “Format.” After that, we had to either click on “Autofit Row Height” or “Autofit Column Width,” or both based on your need. We’ve seen a bit faster approach with keyboard shortcuts, but now we are about to get blazing fast.
To AutoFit Column Width: Double-click the right-edge separator of the column header. The column will instantly snap to the width of the longest cell entry.
To AutoFit Row Height: Double-click the bottom-edge separator of the row header. The row will adjust to perfectly fit the text in that row.
This is the fastest way to ensure all your content is visible without any wasted space or time.
Fact Check: There are 1,048,576 rows and 16,384 columns in Microsoft Excel.
Method 6: Uniform Sizing for an Entire Worksheet
Want to make every cell in your sheet the same size? It’s very important for a neat worksheet. You can use this technique to even create dashboard designs also. It's really easy. Follow the steps:
1. Select the entire worksheet by clicking the triangle in the top-left corner (between 'A' and '1') or by pressing “Ctrl + A” twice. If the worksheet is empty, pressing “Ctrl + A” once will also work.
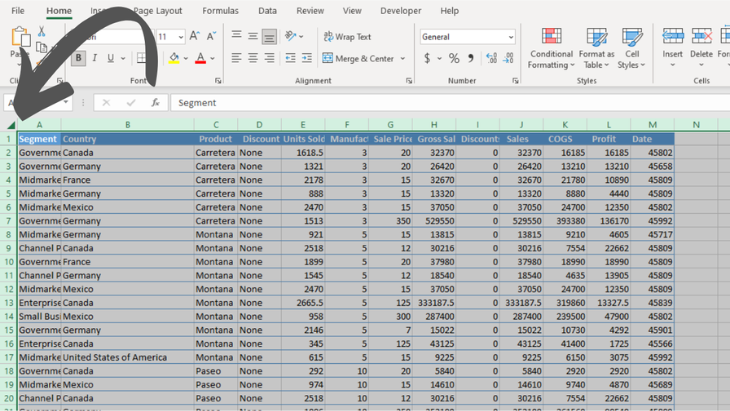
2. Now, use any method above:
Click and drag any row or column separator to set a uniform height and width for all cells.
Use the Format menu to set a specific Row Height and Column Width for the entire sheet.
You can even use the keyboard shortcuts also.
Method 7: The Master Copier (Paste Special for Widths)
This brilliant trick lets you copy a column's width without copying its content—perfect for standardizing your layout.
1. Select a cell in the column with the desired width and copy it (Ctrl + C).
2. Select a cell in the target column you wish to adjust.
3. Go to the “Home” tab, click the “Paste” dropdown, and select “Paste Special.”
4. In the dialog box, select “Column Widths” and click “OK.”
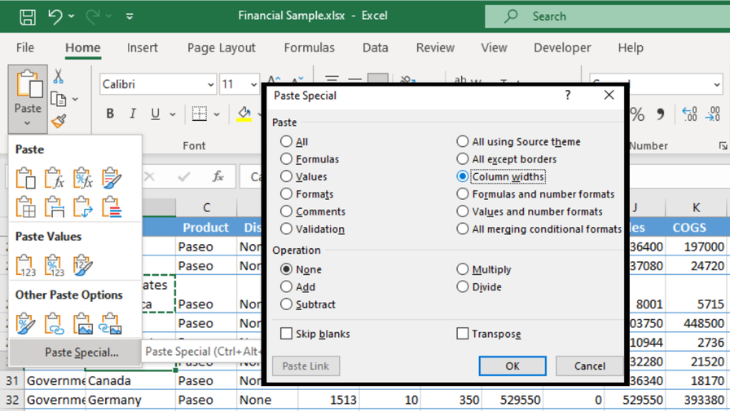
Bonus Shortcut: After copying, you can press Alt + E + S + W and then “Enter” to achieve the same result even faster.
Method 8: Resizing Multiple Rows or Columns Simultaneously
Need to adjust a specific section of your sheet? Or want to make a few rows or columns the same size? That can be done. The secret lies in the selection.
For Multiple Columns: Click and drag across the column letters (e.g., D, E, F) to select them. Then, click and drag the separator of any one of the selected columns. All selected columns will resize to the same width.

For Multiple Rows: Select several row numbers and drag the separator of any one to change all their heights simultaneously.
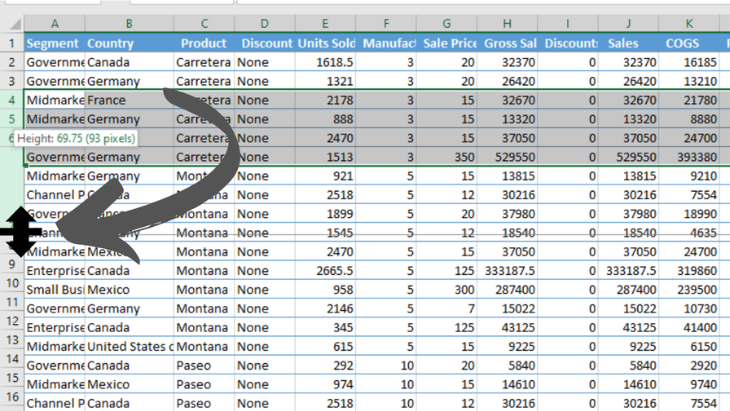
Or you can use any method listed here to resize multiple rows and columns after selecting. It will work fine.
The Ultimate Workaround
What if you truly need one larger cell without changing the entire row or column? The solution is logically impossible. But you can use the “Merge Cells” feature in this scenario. This will not change the cell’s height and width but will merge cells to look and work as a single cell.
1. Select the adjacent cells you want to combine into one larger cell.
2. On the “Home” tab, in the “Alignment” group, click “Merge & Center.”
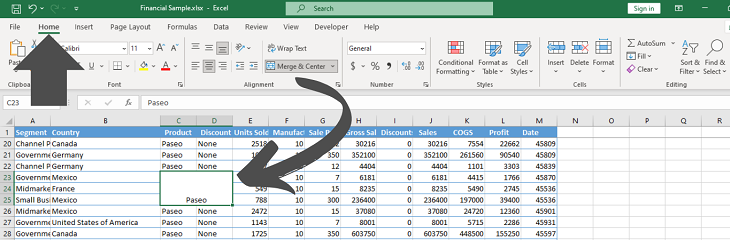
This creates the illusion of a larger cell, which is perfect for creating headers or labels. Use this sparingly, as it can complicate sorting and filtering.
Wrapping text is also an admirable alternative to change row height. It will change the row size based on the text and will not change the column size.
1. Select the cells you want to wrap text or change height only.
2. On the “Home” tab, in the “Alignment” group, click “Wrap Text.”

Now it will cut long text into multiple lines and give you the opportunity to view it clearly, increasing cell height only. This will not literally change the text—it’s more of a visual assistance.
Now you can call yourself an expert on cell size in Excel. You know every possible scenario of changing row height and column width. You know the pros and cons of every procedure, and now I’m definitely sure your worksheet is much more clean and visually appealing.
Takeaways:
For Speed: Use “Double-Click to AutoFit.”
For Precision: Use the “Format Menu” for exact values.
For Consistency: Use “Paste Special” to copy column widths.
For Uniformity: Select the “entire worksheet” to standardize all cells.
For Comfort: Use Keyboard Shortcuts.